Exposed! :: Separation ::
© Copyright 2011. All Rights Reserved.
Contents
- What is separation?
- Why does it matter?
- How to create separation
- Pro Perspective
- Homework
- Final Frame
"But what about the background?"
It's a question I often ask on our workshops. Photographers work hard to make their main subjects look good but often forget to pay attention to the rest of the photo. Everything is connected in life and in photography.
To help make your photos pop try a trial separation.
"A separation?"
Yes!
In this edition of Exposed! we help you create separation between the foreground and background to help your photo stand out.
What is separation?
Separation in photos is a good thing. When you place your main subject or focal point so that it stands out - or is SEPARATE from everything else - the overall photo benefits.
Why does it matter?
Separating the foreground from the background helps the viewer know where to look first. It helps tell the story in the photo and gives the viewer stronger clues as to what is important. Separation helps you create finer photos, be a better photographer, and even win photo awards.
How to create separation?
There are many ways you can create better photos through separation...
1. Focus
Try an experiment the next time you're taking photos. First, put your main subject in focus. Easy, right? Ok next, make the background significantly out of focus.
Keeping the focus on the foreground helps lead the viewer's eye to a specific element. "Oh, it's the only thing in focus - that must be what I should look at."
"Ok, but how? Everything in my photo is in focus." There are three ways to control depth of field. For one quick improvement, simply try getting much, much closer to the main subject.
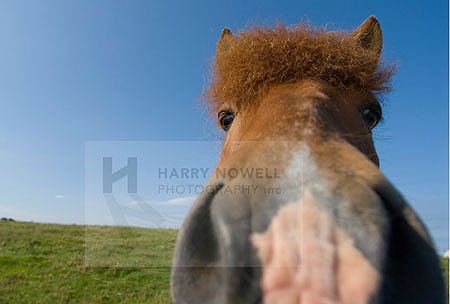
Selective focus makes the viwer focus on the Icelandic pony's eyes.
2. Framing
Use elements of the background to help accentuate the foreground. This starts with slowing down and taking time to observe, look around and notice what's going on in your photo.
Often, you can find a compositional element or shape that will help make the subject stand out. Frame your favourite canoeist (see below) with a background shape or colour that helps separate the subject from the rest of the photo.
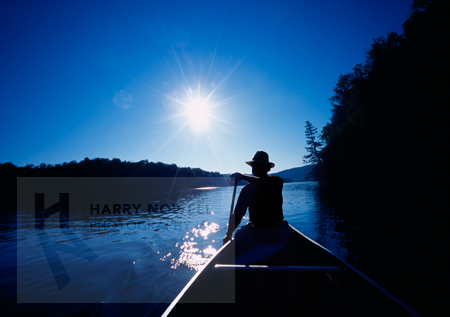
A silhouetted canoeist stands out because he is surrounded - framed - by blue.
3. Colour and contrast
If your main subject is dark or yellow and you place it against a dark or yellow background it will disappear!
So, do the opposite! If your main subject is bright, make sure the background is dark. If your subject is red place it against a dark background! What happens? Well it pops! Kapow!
How? Again, it starts with observation. Look around to notice brights and darks, reds and blues and then ask yourself how to get one in front of the other. Ask yourself "What am I exposing for? The dark elements (shadows)? Or the bright elements (sunny areas)?"
The ideas of the colour wheel helps you decide what colours complement each other and make your photo look good.
Easy!
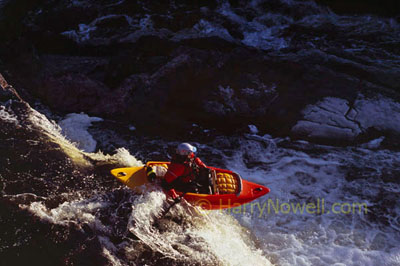
A vibrant sunny red separates the canoe from the shady, dark background.
4. Perspective
Make your main subject BIG compared to the background. This helps show depth and refers to perspective.
It's a simple idea. If something is big we take notice. Learning the ideas of perspective helps you create separation. One simple way to make the main subject bigger is to get closer to your main subject.
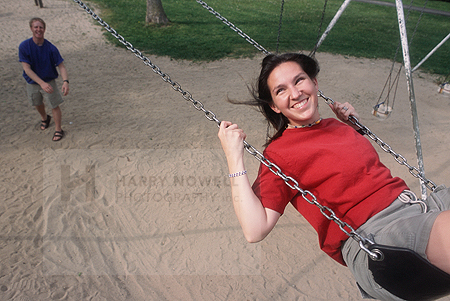
Exaggerating size using perspective fundamentals helps the foreground leap from the page.
Pro Perspective
In my work, I always try to get the backgrounds and foregrounds to work together. It's not always easy! In the photos above I have created separation using photography's fundamentals.
Homework
We touched on some big ideas in small ways:
- depth of field
- perspective
- colour wheels
- exposure
Read, explore, learn and observe. These simple ideas are part of the fundamentals of photography - the cornerstone of your artistic outlet. Many photographers never learn these basics.
It's important to learn the fundamentals!!
And then watch your photos grow!
Final Frame
Take photos.
Have fun!