Exposed! :: How to get correct exposures...
Manual mode - What's all the fuss? ::
© Copyright 2010. All Rights Reserved.
Contents
- What are exposure modes?
- What is metering?
- Bringing it all together
- Pro Perspective
- Homework
- Final Frame
On a summer workshop a new student was watching a dog and human perform tricks for onlookers on the lively strip of Laval St in Hull. A perfect setup for some street portraiture!
It was a complicated photo scenario though. The performing duo were fully lit in mid-afternoon sun while the background was fully in shade.
The student got some great compositions but his exposures varied widely even though the light was not changing. What was going on? I discovered the photographer was relying on aperture priority (semi-automatic) exposure mode - with no adjustments - and hoping for the best.
In a diversely lit scene shot with a semi-automatic exposure mode exposures can suffer if there is no photographer intervention. This month's edition of 'Exposed!' aims to help you get consistently better photos as we investigate the world of exposure modes!
A safe scene for auto exposure modes!
What are exposure modes?
Most modern SLR cameras offer different exposure modes:
- Program mode (P) - the camera chooses aperture and shutter speed.
- Aperture priority (A or Av) - You choose the aperture, the camera chooses shutter speed.
- Shutter priority (S or Tv) - You choose the shutter, the camera chooses aperture.
- Manual - You select both both shutter speed and aperture.
Whatever exposure mode you use you need to learn how your camera meters different levels of light. Understanding that bright tones (like white) will fool your camera is a first step to proper exposures.
Auto exposure modes would fail to get this exposure!
What is metering?
All modern cameras use a reflective light meter to help get the correct light levels for a photo. The camera measures the brightness (or tone) of a scene to determine the correct aperture and shutter speed needed for a good exposure.
This brightness or tone is measured in terms of black and white rather than colour. The camera compares everything to a mid-tone grey and aims for a final photo that also averages mid-tone grey.
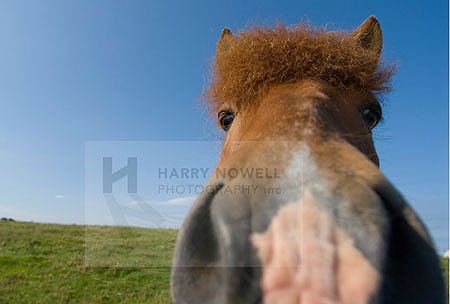
If your scene is consistently mid tone grey (see the Icelandic Pony, above) your meter will read the scene correctly. Any metering mode will give you a reasonably correct exposure.
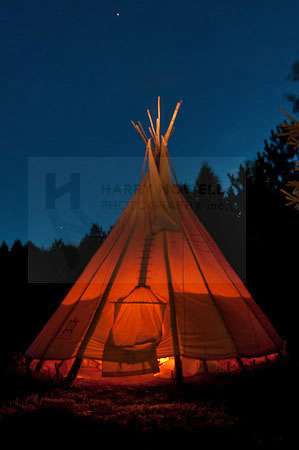
If your scene is anything but consistent mid tone grey (see the night light teepee, above) your meter may misinterpret your scene's ideal exposure and you, as photographer, will need to intervene to get a good photo.
Bringing it all together
Choosing appropriate camera settings for a well exposed or creatively exposed photo takes some experience and practice. Sometimes there can be more than one correct exposure for a scene.
Here's a general guide of the results you'll get using various exposure modes depending on the lighting in your scene
Results | ||||
|---|---|---|---|---|
Scene |
Program mode |
Aperture priority |
Shutter priority |
Manual mode |
mid-tone |
good |
good |
good |
good |
diverse light |
poor |
poor |
poor |
Measure the light on a mid-tone grey card in the same light as your subject and you'll more likely get a correct exposure. Easy! |
By choosing the programmed modes without making corrective adjustments for diverse lighting you are allowing the camera to make some critical creative choices for you.
Once you learn the theory of exposure and light you can use non manual modes effectively to produce creative photos
Pro Perspective
My first job ever, as a rookie photographer, was to take portraits of tourists at the top of Sunshine Village Ski Resort near Banff, Alberta. There I learned a valuable lesson from Roger Whitney. He taught me what many photographers never learn - that bright snow (and other, non mid tone grey scenes) will fool your camera's meter.
Since then, I almost always shoot in manual mode to ensure I get the correct exposure.
What do other photographers use to get correct exposures? I asked a few colleagues:
Ron DeVries:
I use manual exposure mode 99.8% of the time and I don't trust auto exposure mode, too many times it will make mistakes.
Manual exposure gives more control, more accuracy with exposure, especially with flash on camera for balancing ambient with flash exposure.
I'm old school, graduated 1980, shot 4x5 and medium format for years with handheld ambient/flash meter.
Claude Brazeau:
I use manual when I need full control of exposure and when using a flash, especially off-camera flash. ex: Studio work, backlit situation, etc...
I use aperture priority when I'm in a moderately controlled situation and need to make adjustments fast. ex: Inside a church/house where the lighting is even..
I never use shutter priority since I'm a portraitist and my subjects don't move very fast :-)
There's no right or wrong on what setting you use, just the right setting for the situation.
Aaron MacKenzie Fraser
I've always shot in manual mode. I like the ability to have total control
over my exposure and be able to adjust accordingly.
Colin Rowe
Most of the time, I shoot on manual. I am usually modifying the light with external strobes, so I want consistent exposures with that.
If I have to shoot an event, I am fully auto.
If I am shooting snaps, or work that does not require external strobes, I am on automatic, though do use exposure compensation (ie makes corrections) a lot.
Christine Denis
I shoot in manual because I want complete control over what I capture with my camera. I make the decisions - not the camera - on what part of the image will be exposed correctly and what type of motion will be captured. The results are properly exposed images, with nice skin tones, and sharpness where I want it to be.
Shooting in manual also gives you the freedom to be as creative as your imagination will take you.
Homework
Learn the basics of exposure and practice in manual mode. As you become more experienced and learn how your camera works in different lighting conditions you can photograph more complex scenes and use auto settings with effective results if desired.
Final Frame
The dog and human played for the crowd and challenged our student's cameras. The photos shot in challenging mixed-lighting helped drive home the point of exposure and the importance of understanding the camera's interpretation of the scene.
Take time to learn the fundamentals.
You'll create better photos.
And have more fun!

