Exposed! :: Why is the snow grey?!? ::© Copyright 2007. All Rights Reserved. Contents
I was perched on my ladder photographing the Eastern Canadian Ski Championships in Quebec's amazing Gatineau Park recently when a ski Dad looked up and asked, "What are you doing?" He was perplexed because my camera was aimed nowhere near the anticipated action. I replied, "Do you ever get grey snow in your pictures?" He nodded and I explained one of the most fundamental and misunderstood aspects of photography - exposure. In this edition of Exposed! we shed some light on grey snow and how to make it white! Let there be lightWhen there was a gap in the ski action I explained that the changing light conditions (full sun, partial sun and full cloud) were keeping me on my toes. I had to adjust the exposure regularly and I knew large amounts of white snow in each ski picture would fool my camera's light meter. Camera TechnologyCameras have become increasingly sophisticated in the last two decades - but I have not found a single one that can take a predominantly snowy (i.e. white) composition and keep the snow white without photographer intervention! If the viewfinder is mostly filled with white snow the meter or the automatic programs will help you create beautiful grey snow. Yuck! Why does this happen? I have heard photographers blame overcast weather. Or their cameras. And I am sure photo labs have been blamed for the grey snow! I have had "experienced" photographers proudly show me "beautiful" pictures with grey snow. What they are really showing is their need to understand the fundamentals of exposure.
The Real TroubleThe real trouble lies with the camera operator's understanding of exposure and their camera's light meter. A camera's meter compares everything to a specific tone (which is different than the colour) of grey. Most of the time the subjects we shoot are comparable to this specific grey tonal value. But when our composition is predominantly white the camera tries to make the white darker - just like the average grey tone. In the white snow scenario the camera will try to make the snow scene grey - or underexposed. The SolutionSo how do you fix the grey snow? You could use Photoshop - time consuming!!! You could twiddle with camera settings until the digital preview shows white snow - a shotgun approach that can work but can cost you missed opportunities each time the light changes! There is a better way. The first step to shooting snow or any white scene effectively is to recognize when there is a potential problem. Will there be a lot of white in the picture? If so, one solution is to take a meter reading from something that has the proper grey tonal value... exactly what I was doing when the ski Dad saw me aiming my camera away from the anticipated action! Which leads us to this month's homework exercise! HomeworkIf you are using a film camera try this exercise with slide (positive) film. It will show errors or successes in exposure better than print film (negatives). Slides are the actual (positive) film in your camera whereas prints are corrected interpretations of the actual (negative) film in your camera. Please make notes, too. Your first job is to find a predominantly white scene to photograph - a snow-covered farmer's field, a white wedding dress, etc. While in manual exposure mode fill the viewfinder with snow and find an appropriate exposure. What does the meter say? Without changing the exposure settings what happens to the meter if you fill the viewfinder with blue sky, grey asphalt from the road, the flat palm of your hand? Even though they should all be in the same light the snow will give you a very different reading than the other average grey tones. Remember what the white snow does to the camera's meter! Now set your camera on a tripod to make sure all the pictures in this exercise have the same composition. Make sure the viewfinder is mostly filled with white.
The first two steps should produce pictures with grey snow. In step three the snow should get whiter. As a general rule, one to two extra f-stops of light should make the snow look good. Pro PerspectiveMy job as a photographer involves recognizing potential pitfalls. With a solid grounding in the fundamentals of photography I can avoid the problems of grey snow. I can also create fabulous pictures with advanced exposure techniques. This is where it gets more fun for my clients and me! Final FrameYou need to walk before you can run. A solid understanding of the building blocks of exposure will help you create finer photos! Maybe a Creative Fundamentals course can help. Take photos. Have fun! |
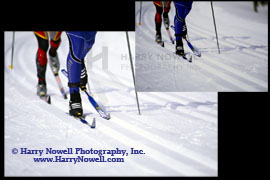
Samples
|